The second week of March is all about reducing stiffness throughout the hip region. Sometimes low back pain can be a result of hip tightness. It may also contribute to movement dysfunction, nerve compression and symptoms in to the thigh and lower leg.
This week’s stretch is called Figure 4. There are 2 parts to performing this exercise; the contract/release method and the static stretch. Note that for the beginner version of the static stretch discussed below, you may need some wall space.
If you have a history of knee pain or difficulty getting up and down from the floor, this may not be the right exercise for you. As with all exercise programs, it is recommended to contact your physician, physical or occupational therapist to determine what is best for you.
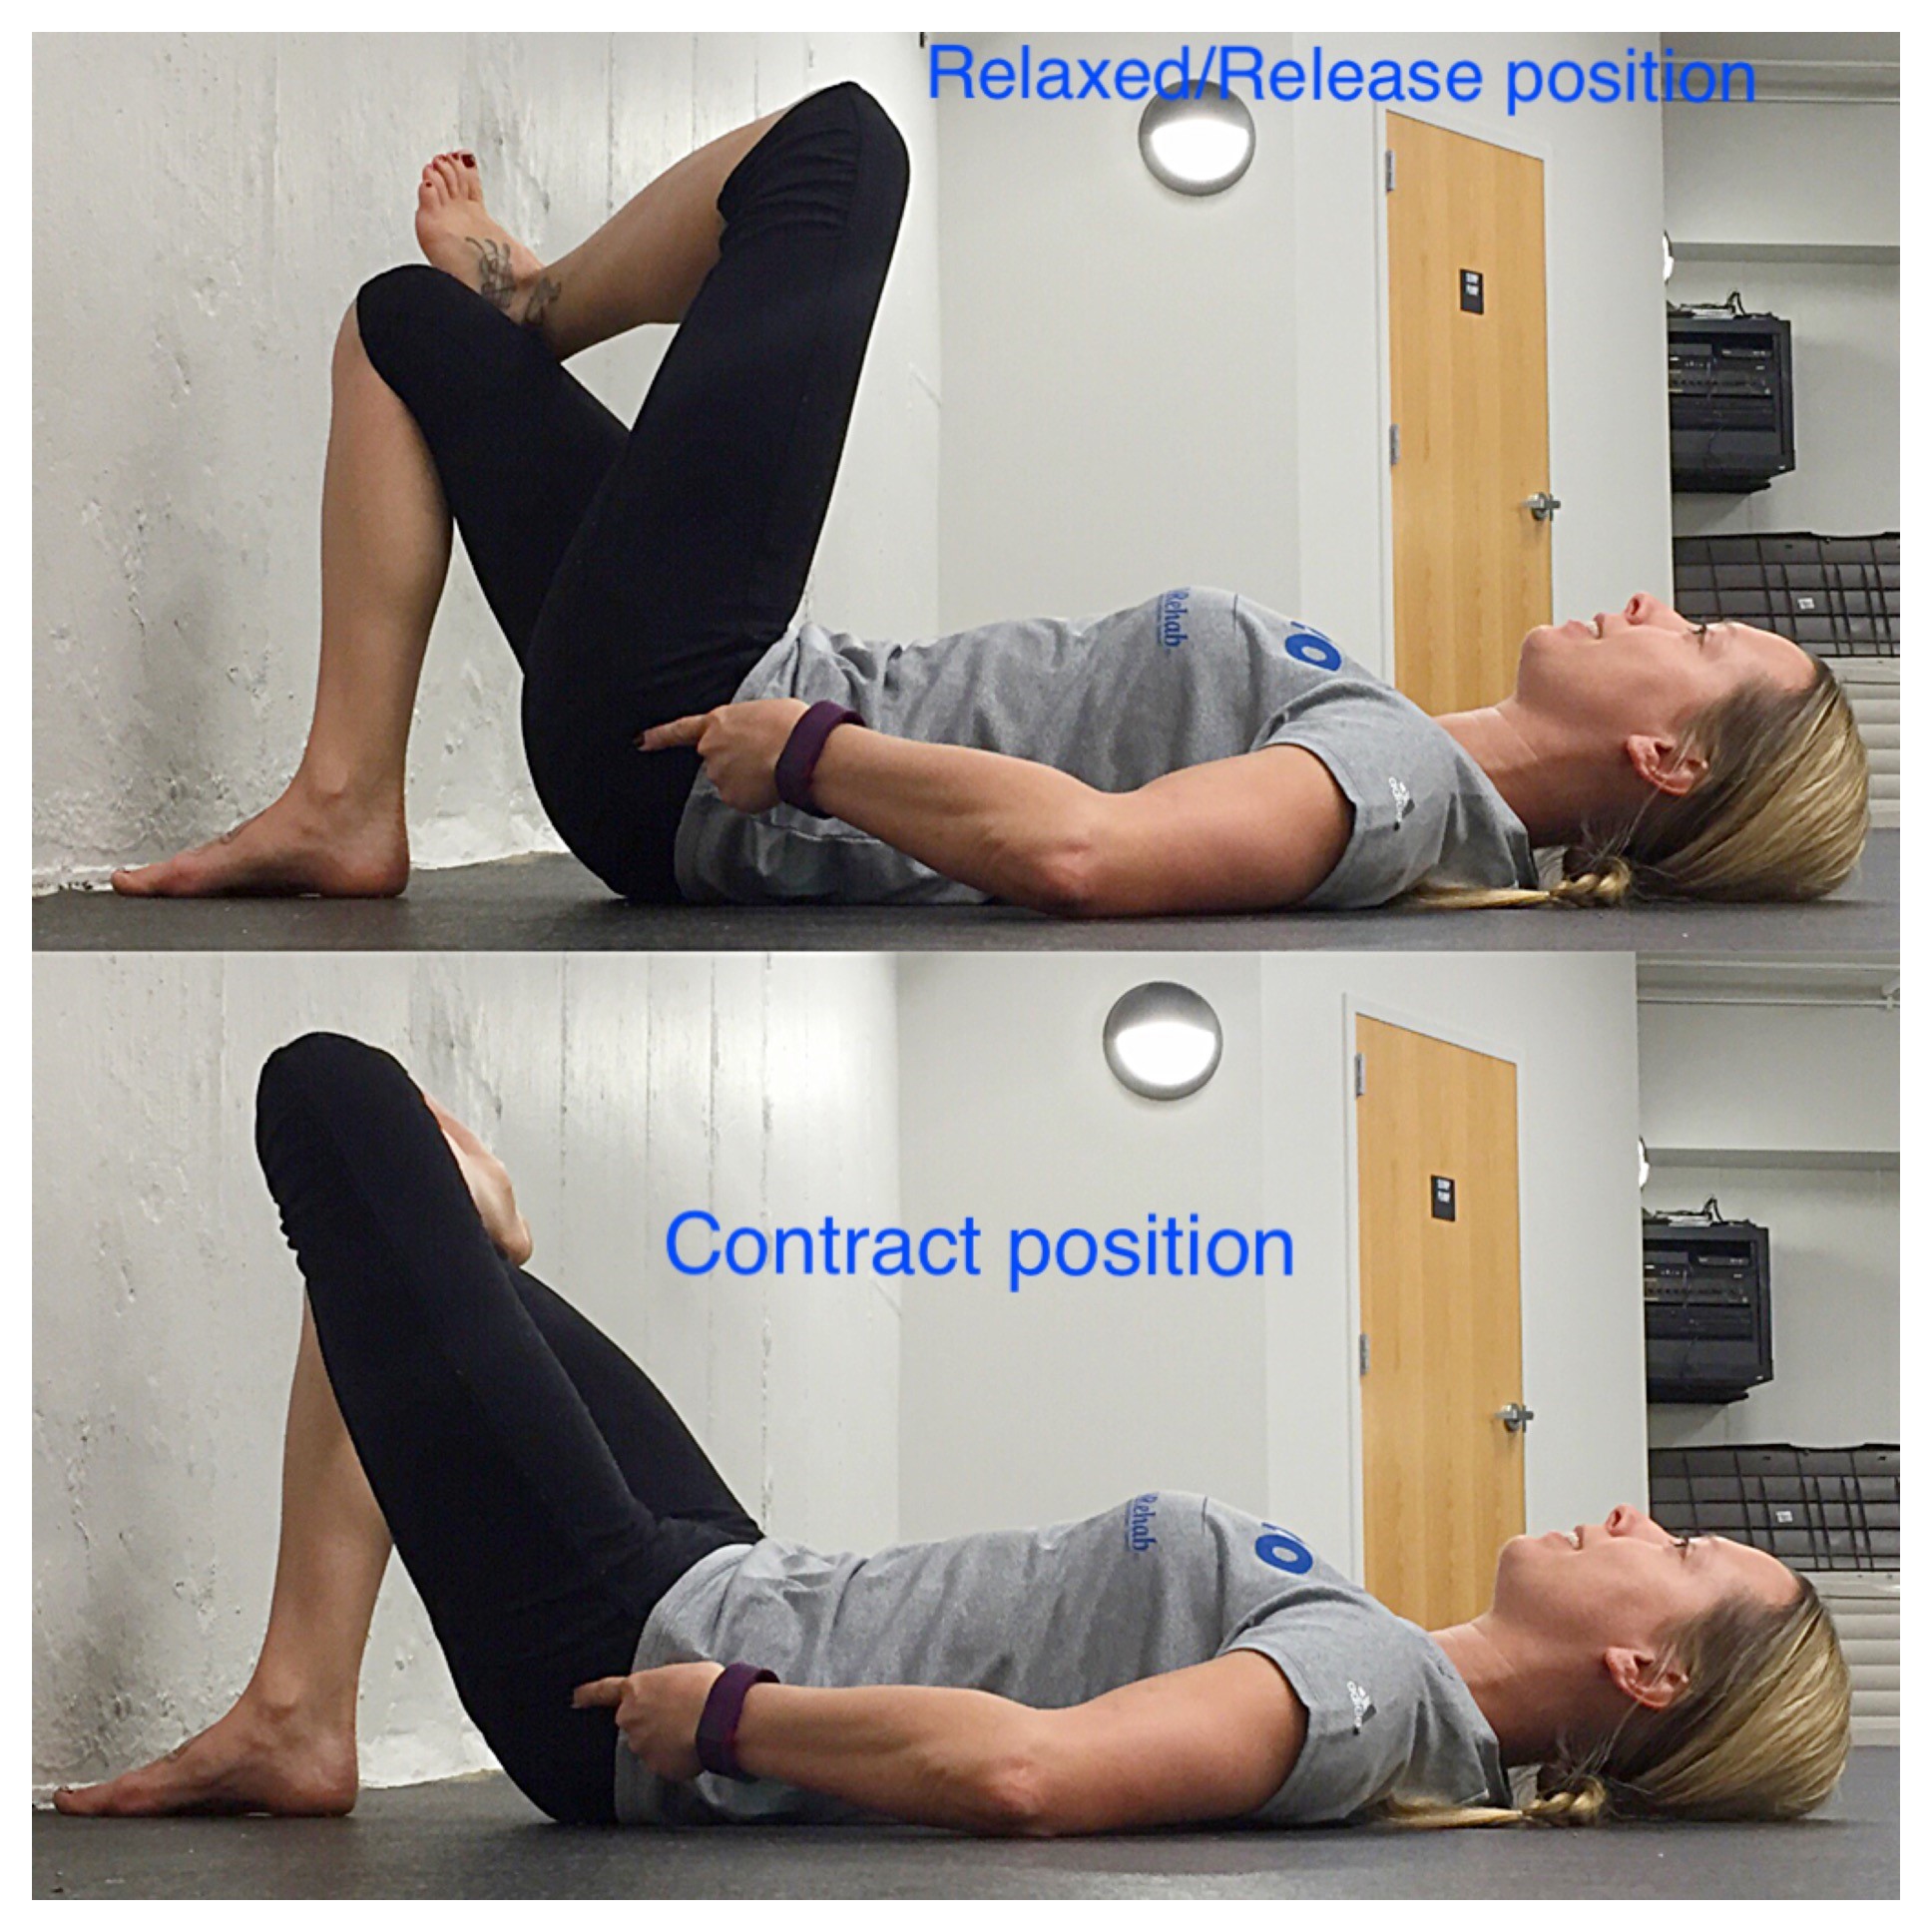
Step 1: Contract/Release:
- Begin by lying on the floor on your back. Bend your knees so your feet are on the floor. Bring your left ankle and place it on your right knee. Lying in this position, allow your body to relax. If your musculature is tight you may already be feeling a stretch through the hip.
- Slowly bring the left knee away from you by contracting the muscle on the outside of the hip (where my finger is pointing to in the photo). Contract as hard as you are able, but ensure you are keeping the rest of the body relaxed and avoid arching the back. Hold for 5 seconds. Then, very slowly, relax the muscle so the leg returns to the starting position. Repeat this 5 times. Over time you will understand what it feels like to relax and release tension within the hip muscles. Complete this prior to performing the static stretch.
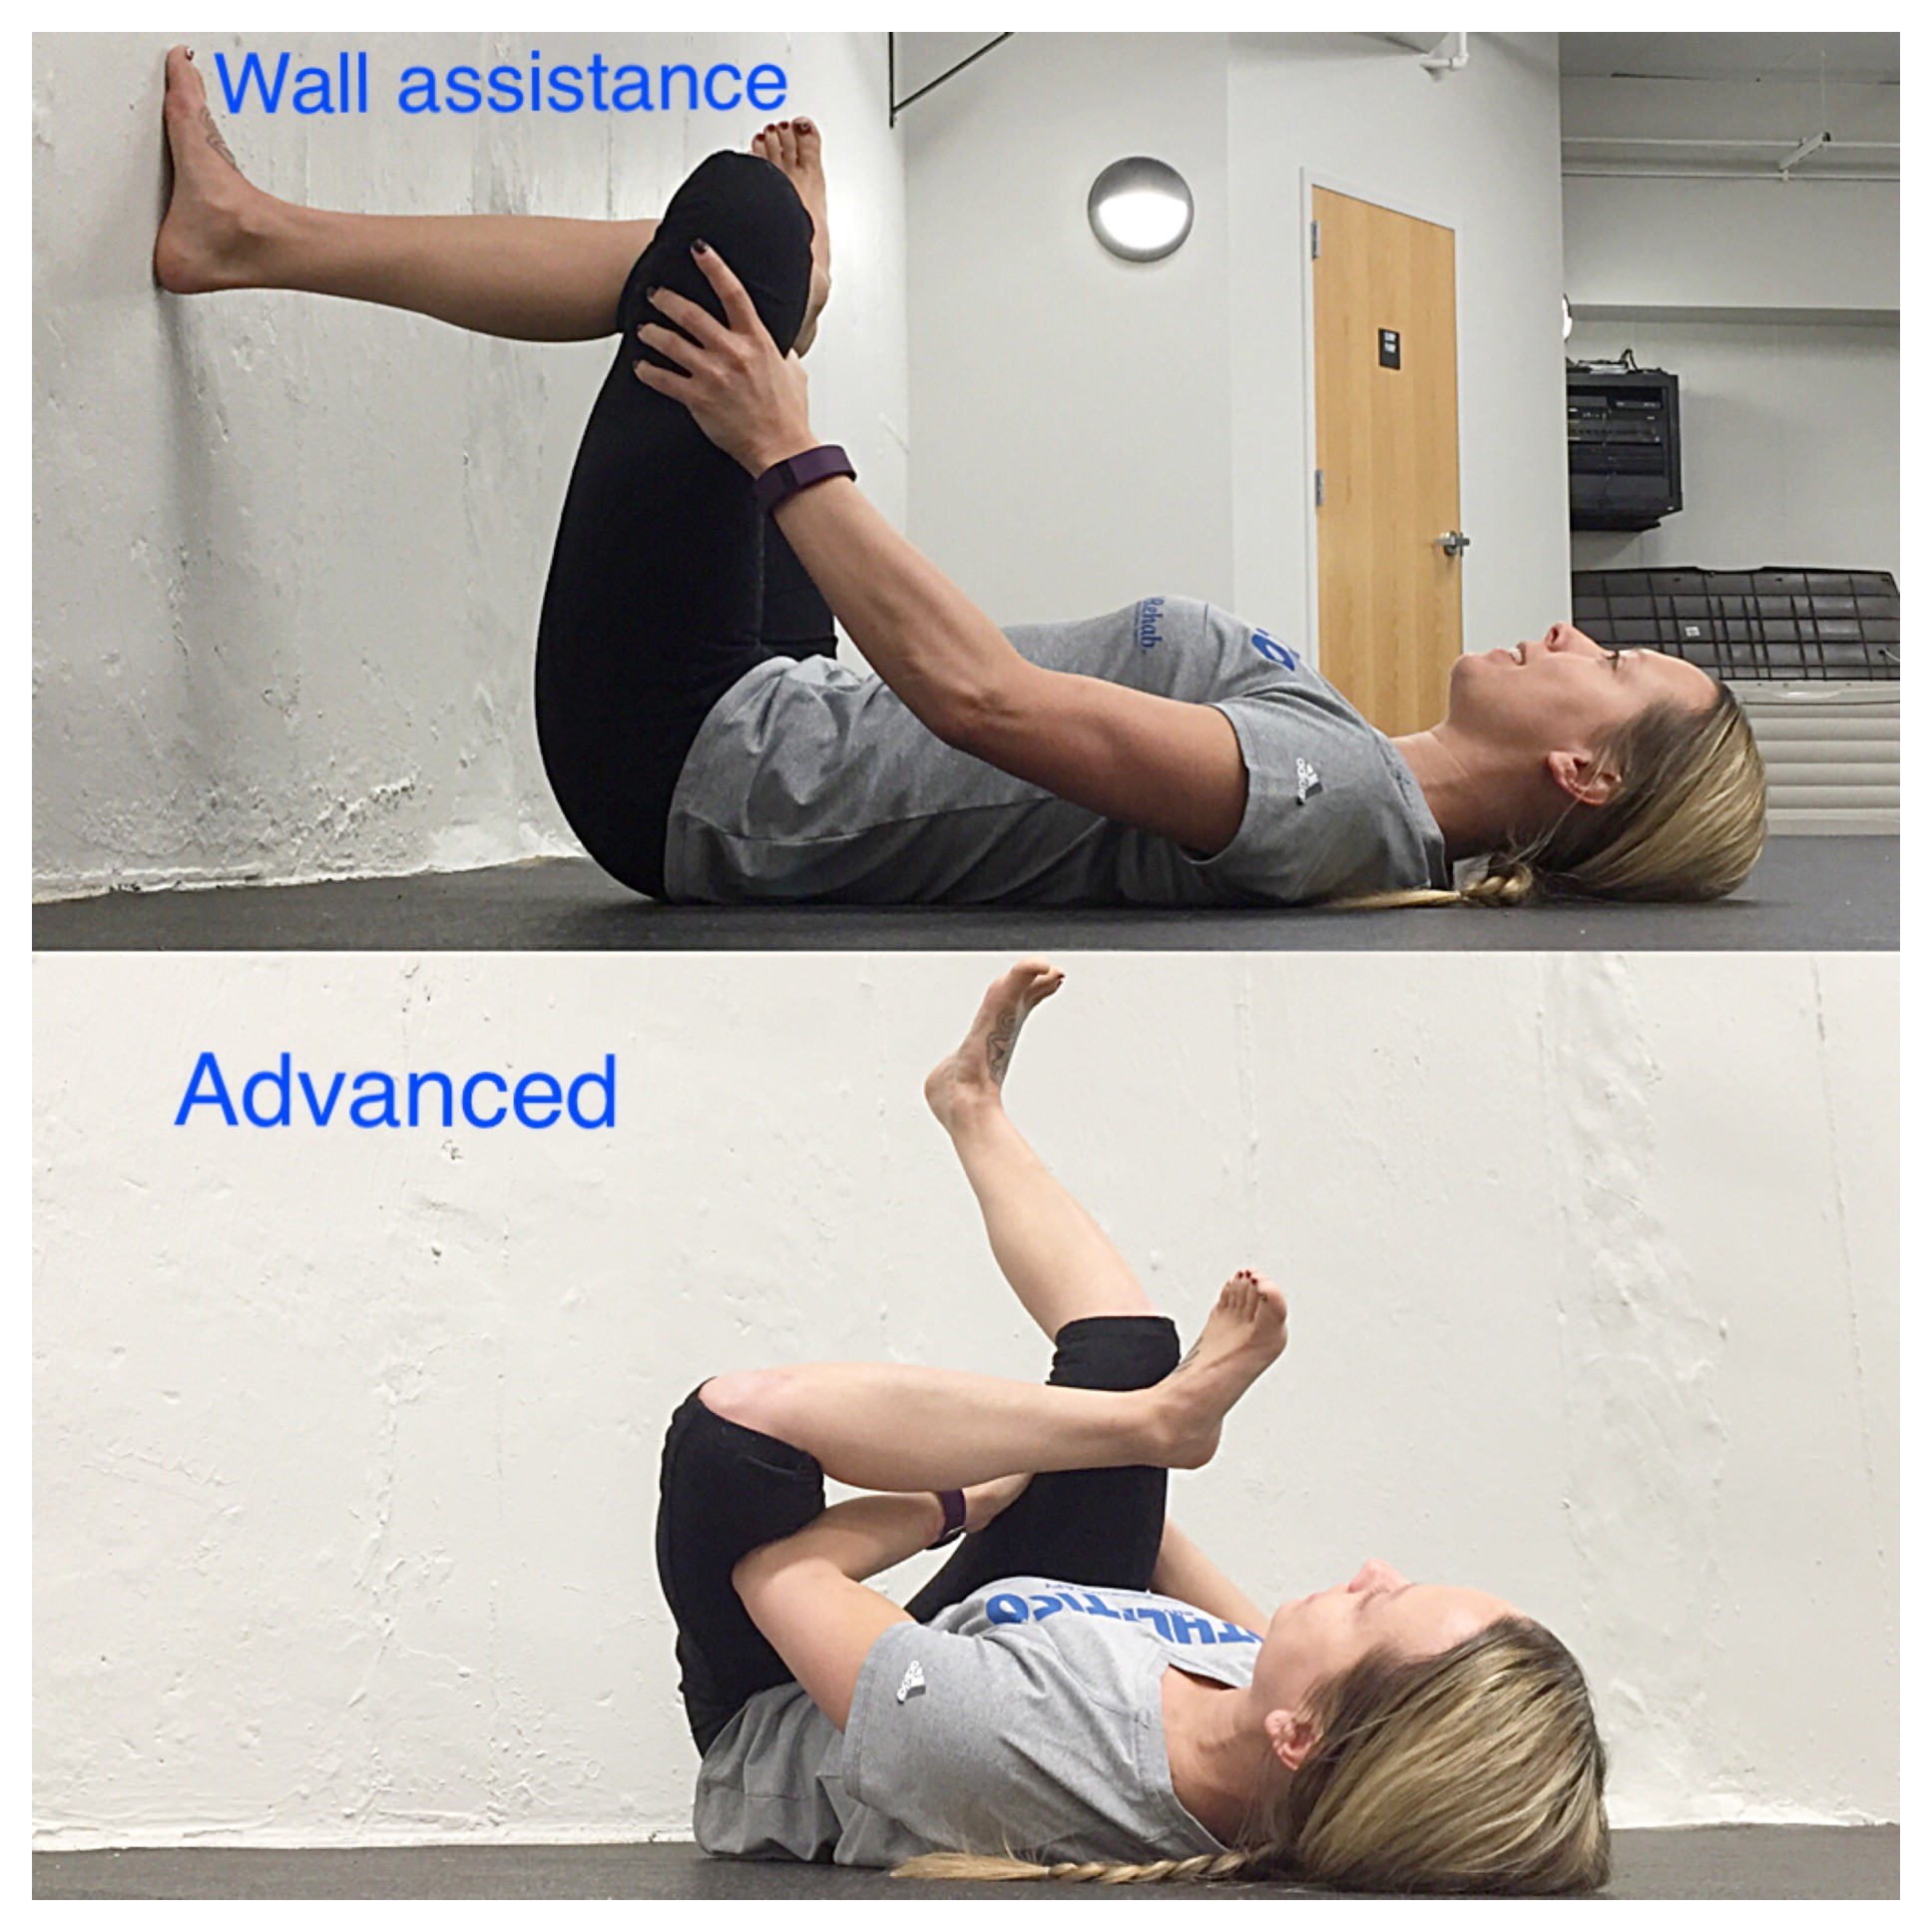
Step 2: Static Stretch:
- Begin next to a wall, lying on your back. Place your feet on the wall so your knees are bent at 90 degrees. Your ankles should be in line with your knees and your knees should be positioned over your hips. Bring your left ankle and place it on your right knee. Gently press your low back towards the floor.
- From here take your left hand to the left thigh as shown in the top photo below. Gripping the thigh with the hand, gently press the thigh towards the wall. Keep the rest of your body relaxed. If you are not feeling much of a stretch, then progress to the advanced variation described below. Otherwise remain here.
- Advanced: For the advanced variation, draw the legs towards the chest by wrapping your hands around the right thigh and gently pull towards you. Keep both feet flexed and the right leg bent. Ensure that the shoulders and neck remain relaxed and you are not holding your breath.
- For either the beginner or more advanced positioning, hold 30 seconds to 1 minute. Then alternate to the other side. Have any questions? Leave me a comment below.